Blend has a new CMS partner! Check out all the details on our newest supported platform.
Integrating Azure AD with Optimizely CMS 12
The introduction of Optimizely CMS 12 brings many changes, chief among them being the switch from full .NET framework to .NET 5 / Core. One area that has seen some relatively large changes is integrating with Azure Active Directory. Blend's Director of Development Bob Davidson talks through what this means.
11/9/2021
Authored by
Categorized
The introduction of Optimizely CMS 12 brings many changes, chief among them being the switch from full .NET framework to .NET 5 / Core.
With the change of frameworks comes many subtle and not-so-subtle changes to many aspects of the site setup and development. One area that has seen some relatively large changes is integrating with Azure Active Directory. The official Episerver documentation gives some good guidance here, but (at least at the time of this writing) leaves out a few details. So here I’ll walk through the process, start to finish, for switching your Optimizely CMS 12 site from built-in authentication to Azure Active Directory authentication.
The process consists of two basic phases: Setting up the Azure AD app, which is mostly clicking, and configuring the CMS, which is mostly coding.
Set up the Azure app.
In order to integrate with Azure AD, you first need to set up the application. These steps will walk you through a basic Azure AD Application setup.
- Log in to Azure and go to your Azure Active Directory.
- Select App Registrations in the sidebar, and create a new App Registration.
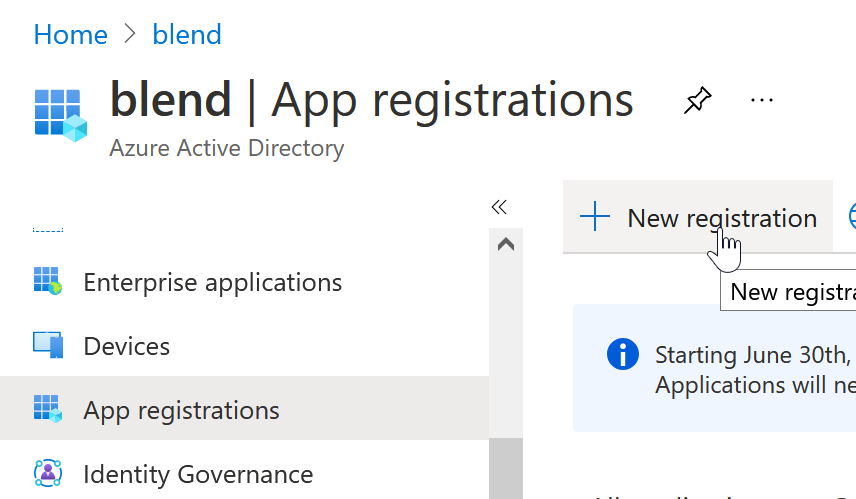
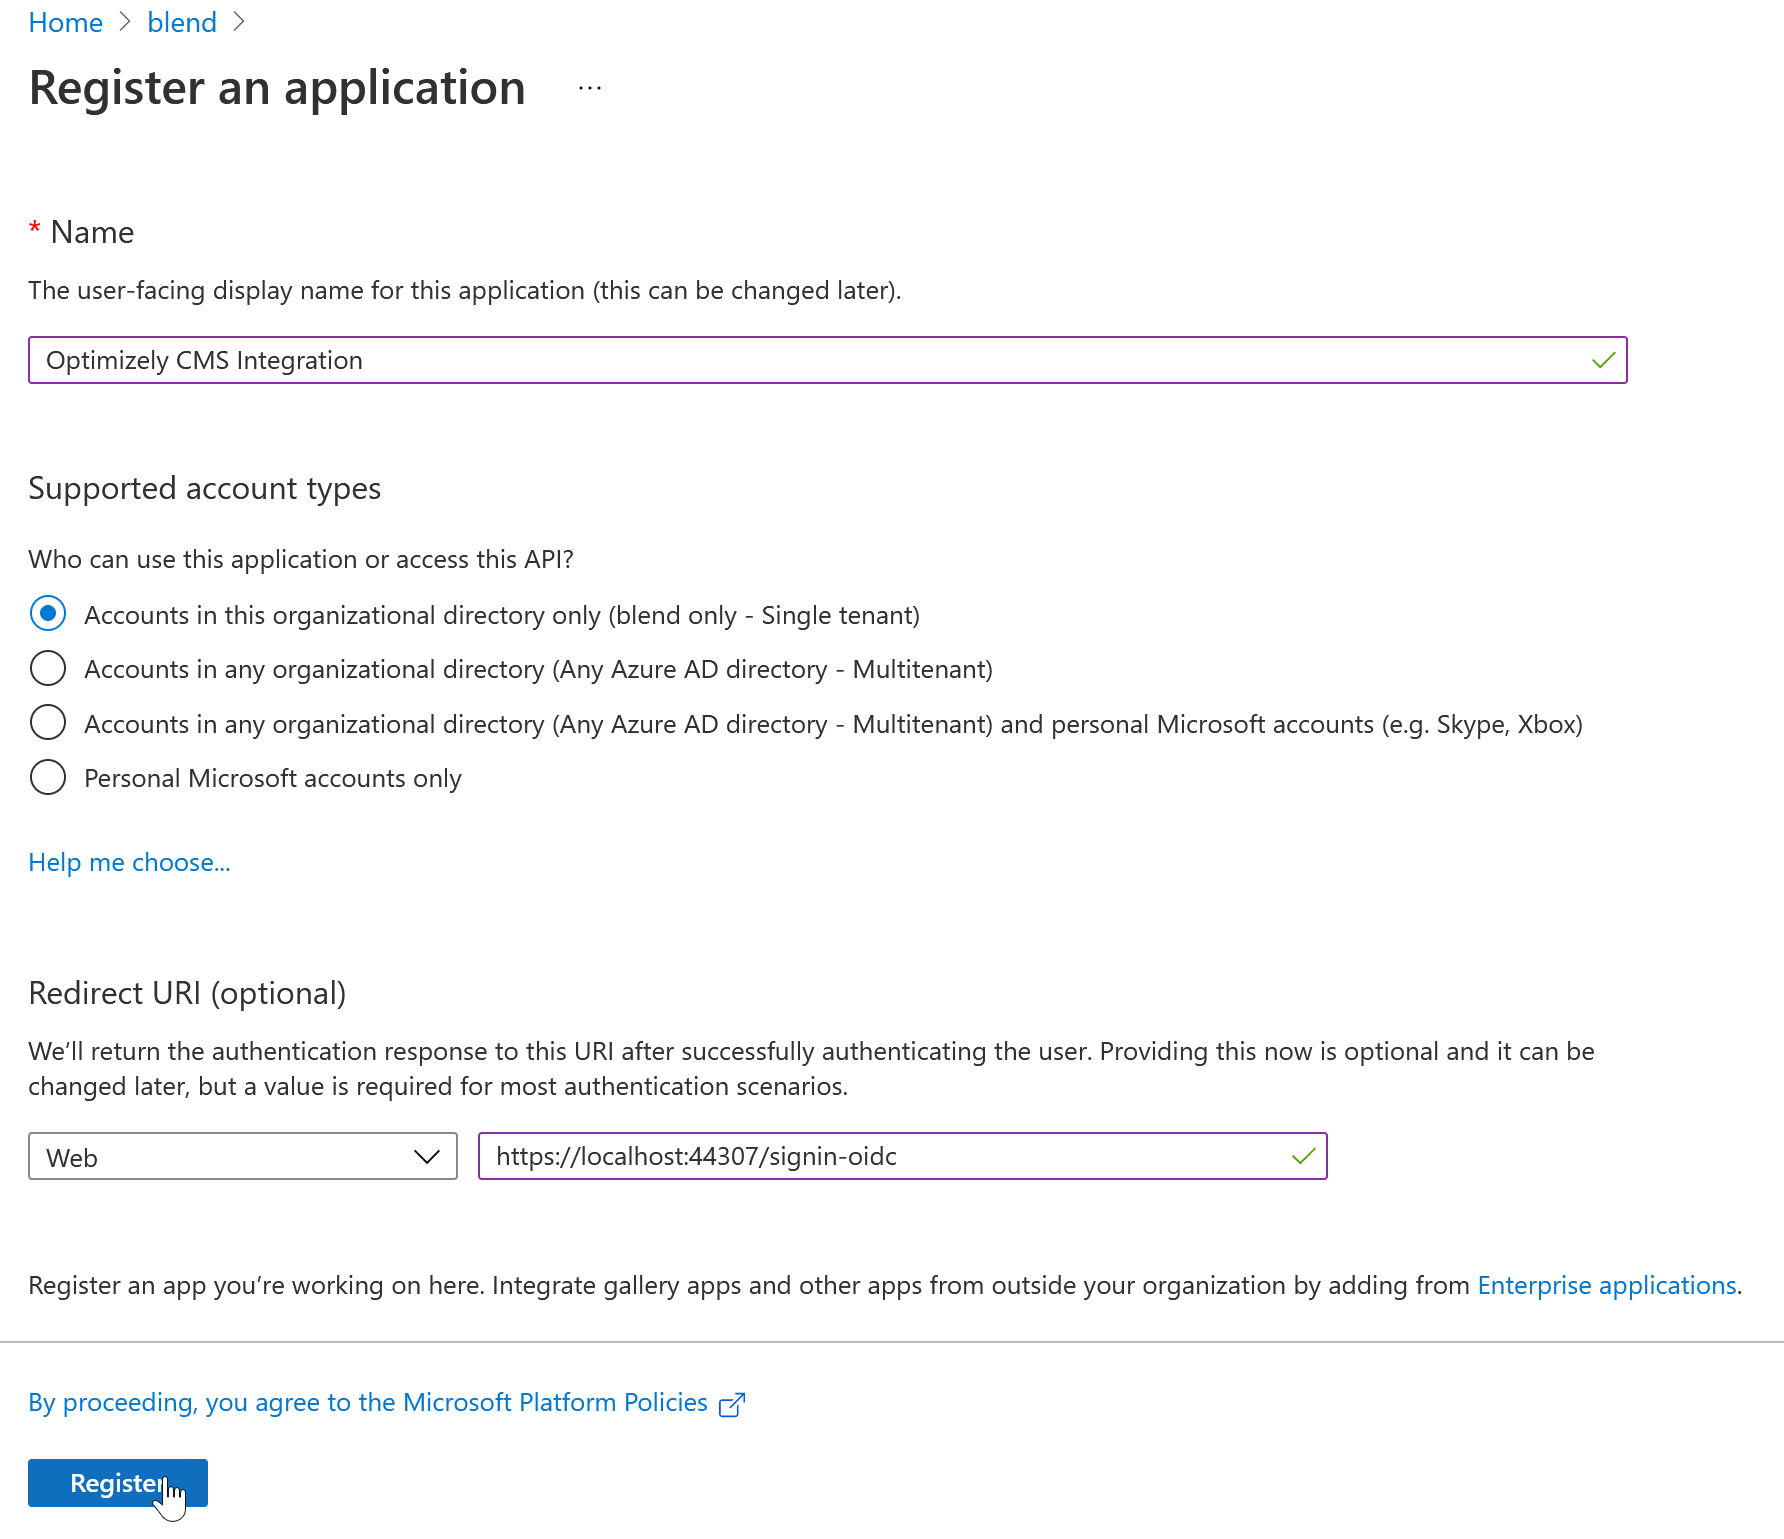
- Give it a sensible name. Unless you have a good reason not to, you want to select “Accounts in this organizational directory only”
- Optionally, you can enter the redirect URI you’ll be using for local development. For example:
https://localhost:44307/signin-oidc. This is basically the IIS Express domain and port, followed by asignin-oidcpath segment. - Click Register
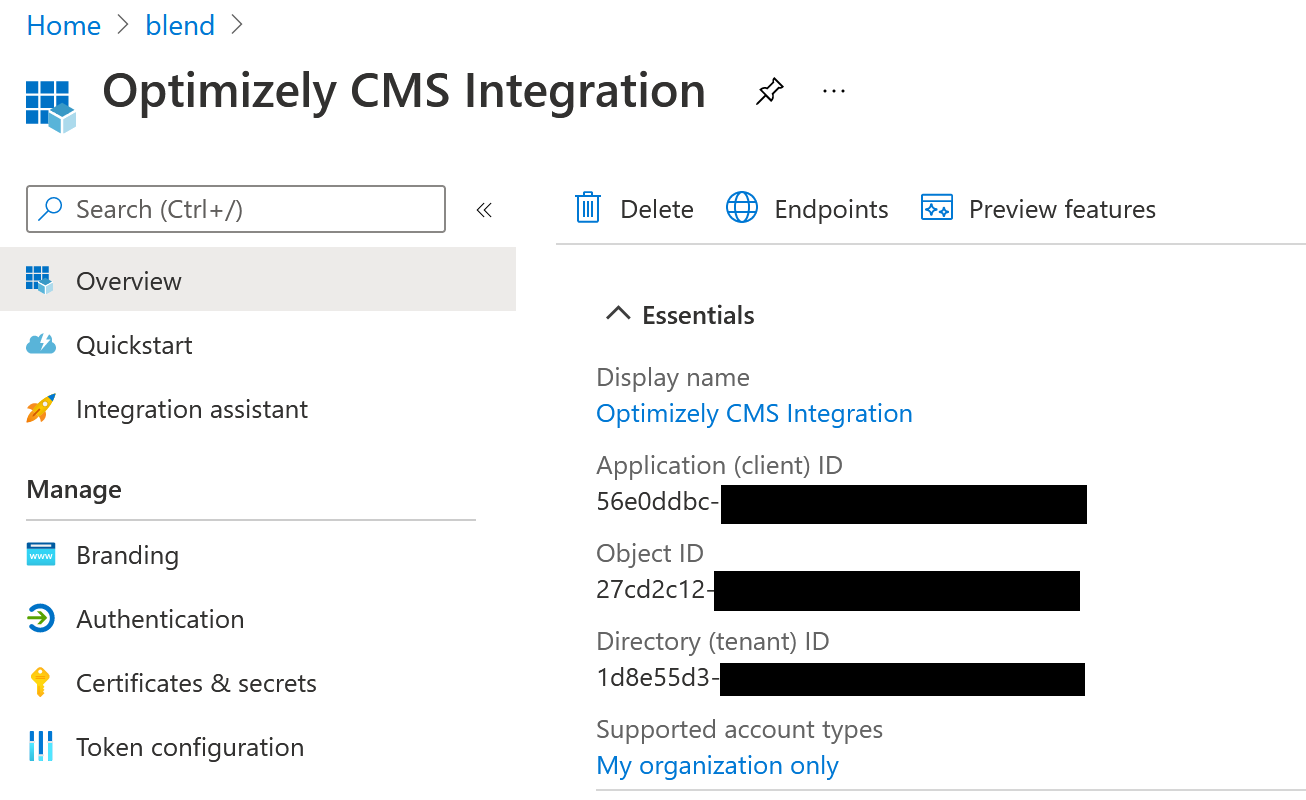
- Make note of the Application (Client) ID and Directory (tenant) ID. You’ll need these later.
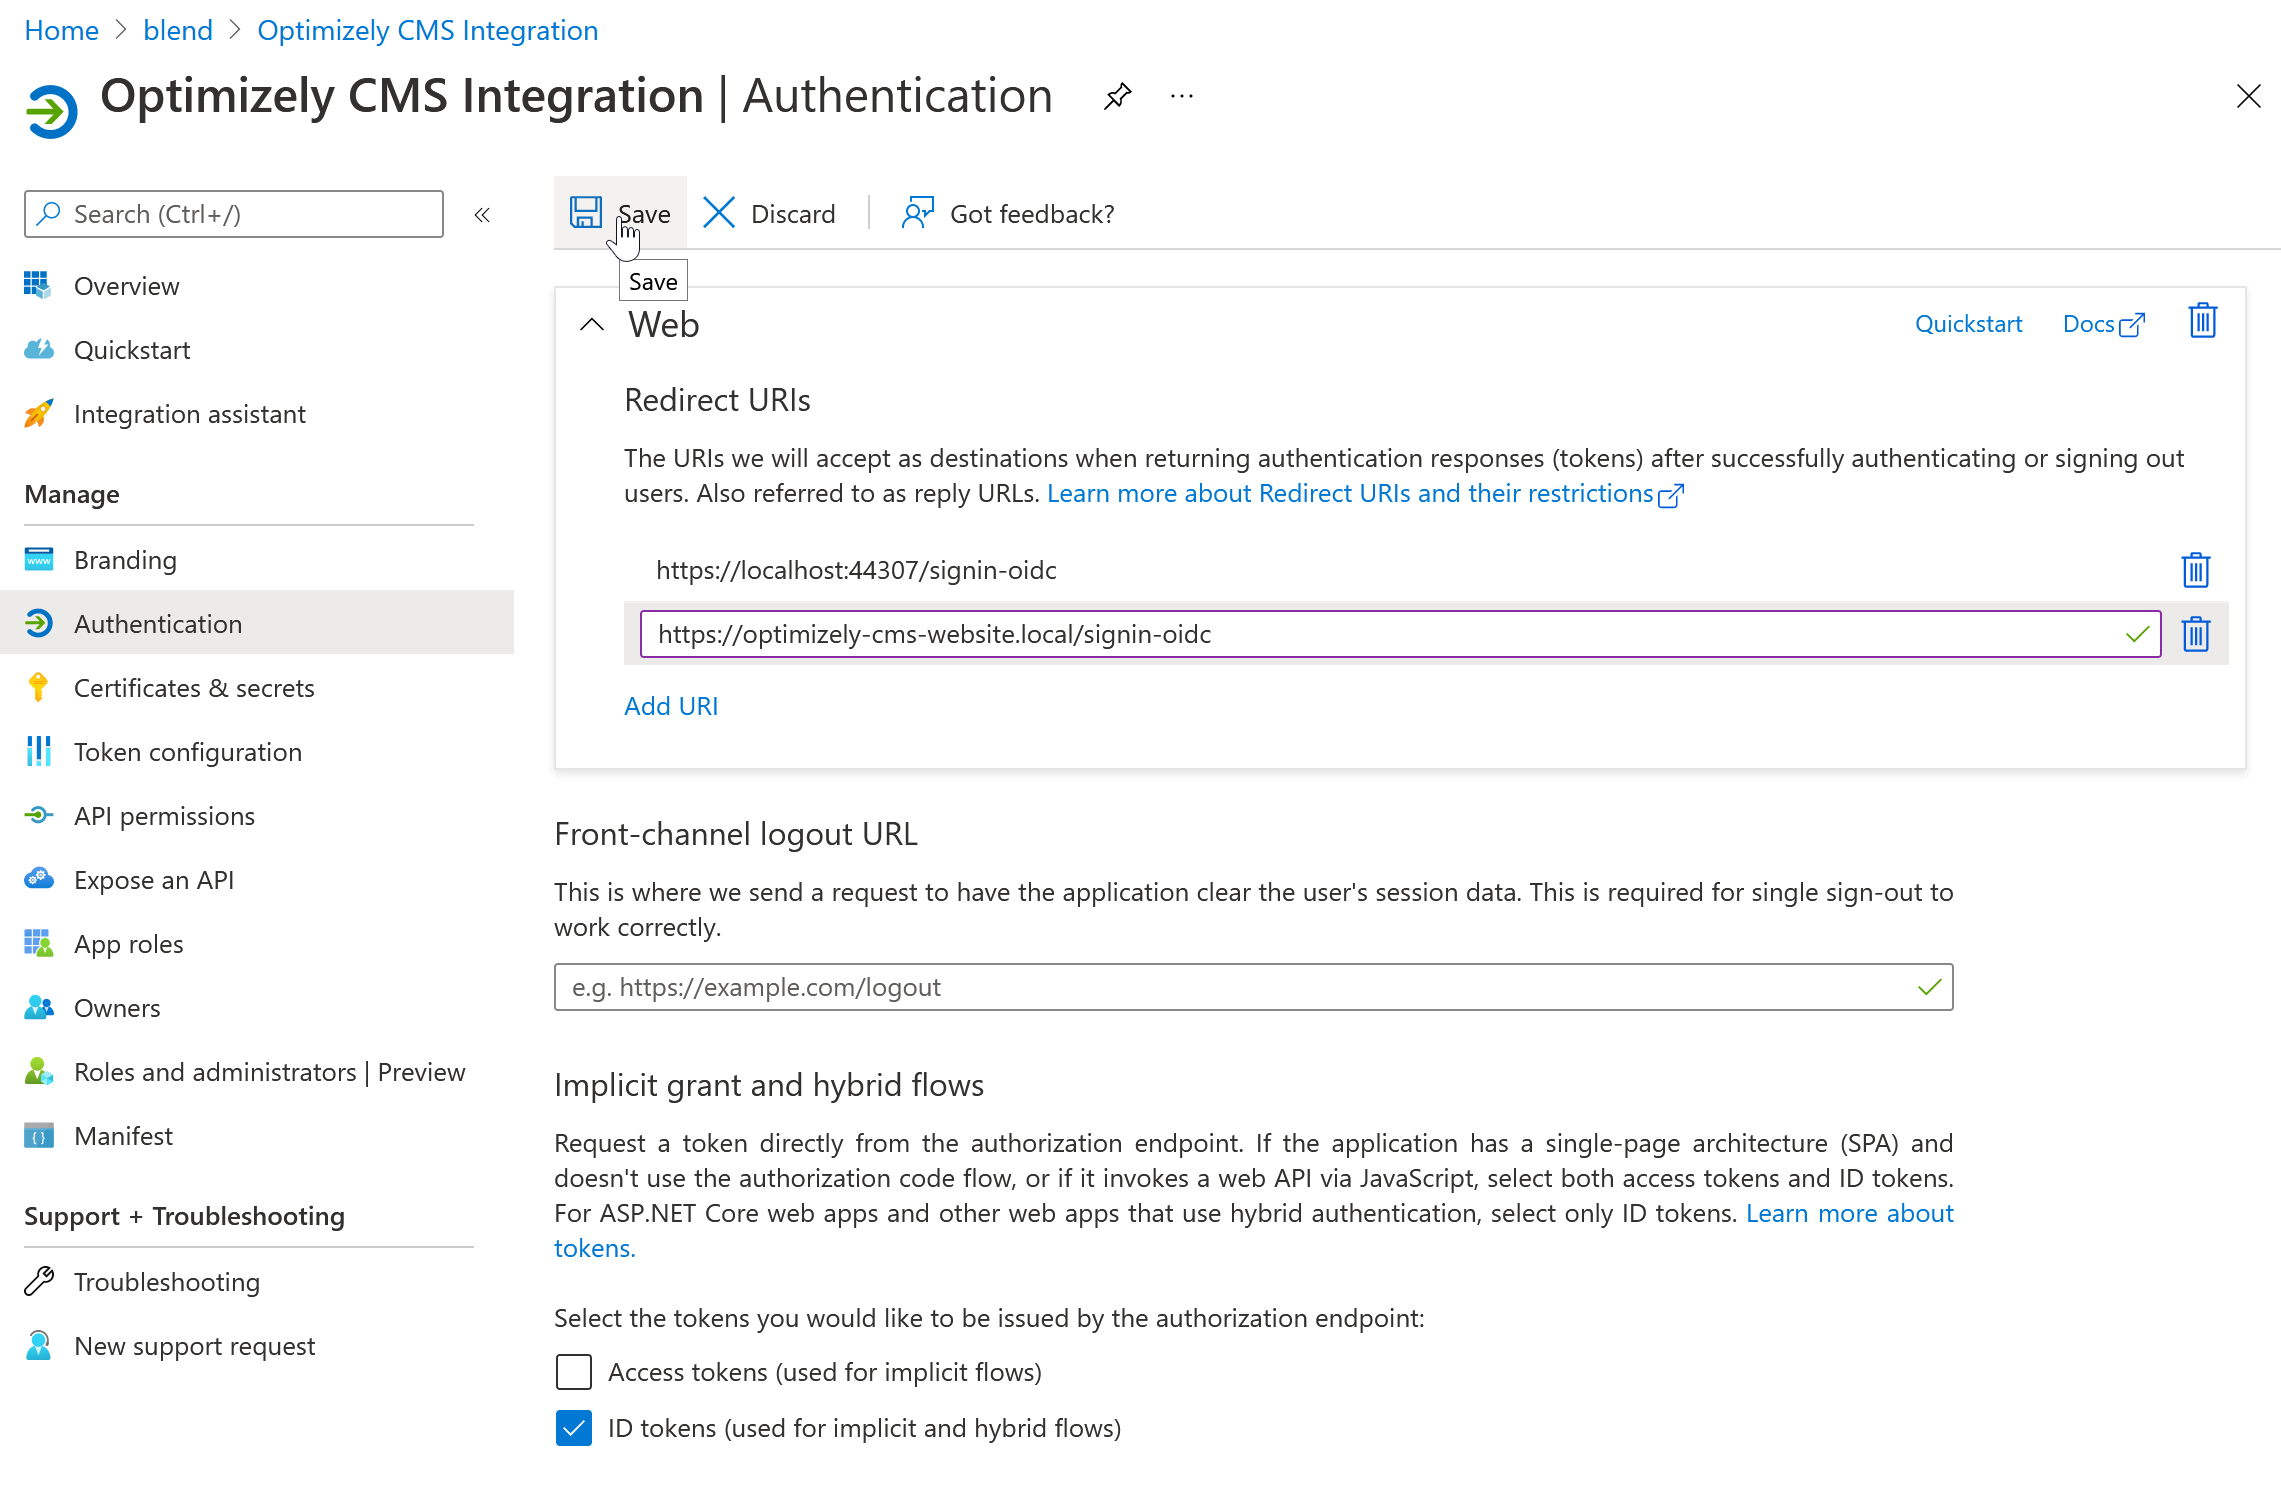
- Select Authentication in the sidebar.
- Add any additional domains you’ll be logging into this application from. For example:
https://optimizely-cms-website.local/signin-oidc. - Make sure “ID tokens” under the “Implicit grant and hybrid flows” heading is checked.
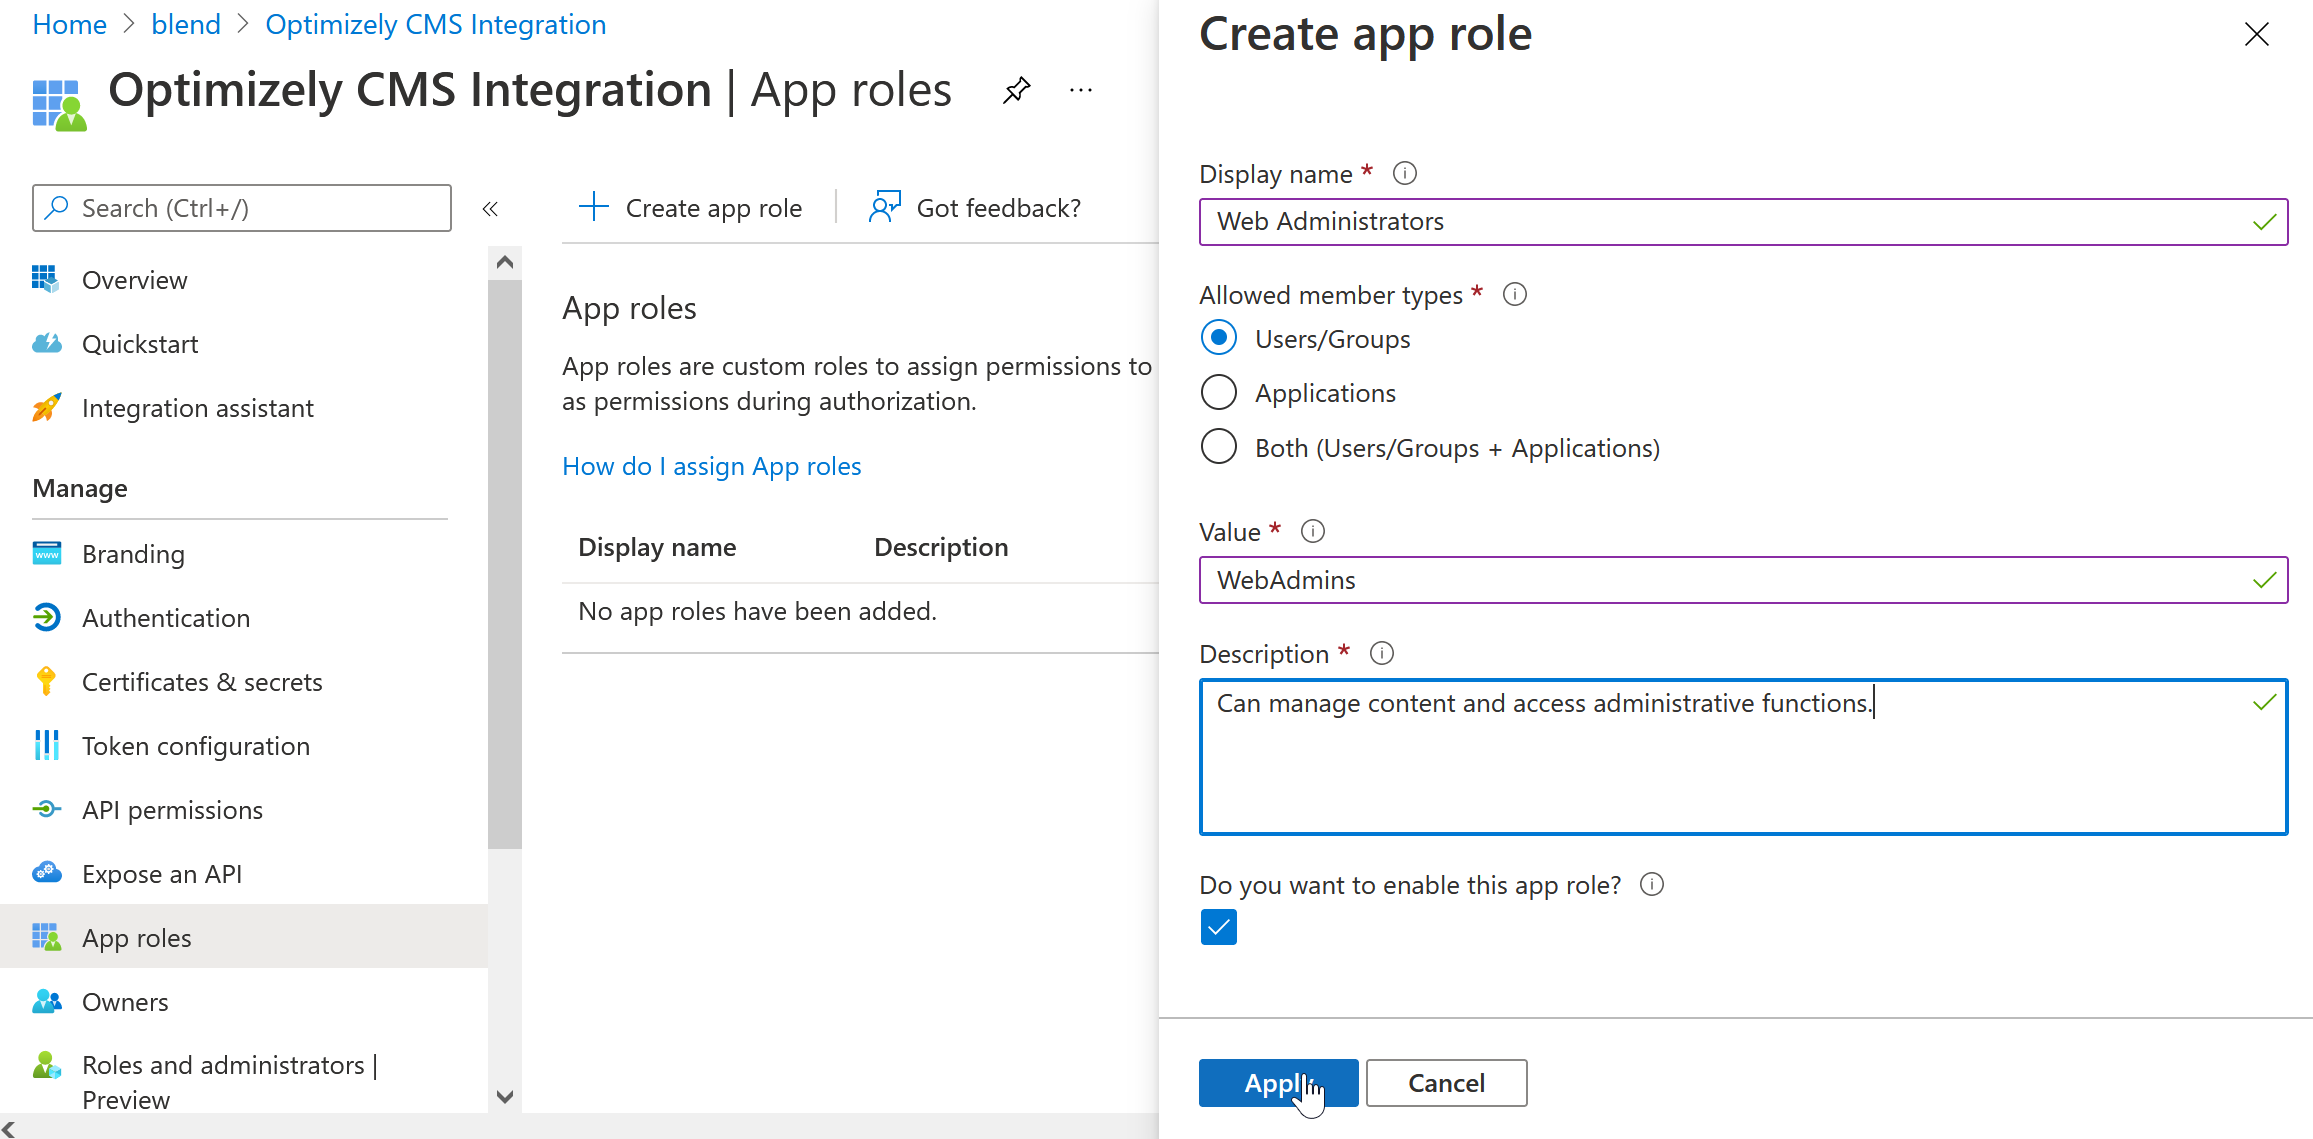
- Next select App Roles from the sidebar.
- Add a “WebAdmins” and “WebEditors” role. These are the default roles Optimizely CMS will look for out of the box.
- You’ll want to allow Users/Groups as member types
- Make sure “Do you want to enable this app role?” is checked.
Add users to your app.
Now that the application is set up, you’ll need to add the users who should have access to your site to your application.
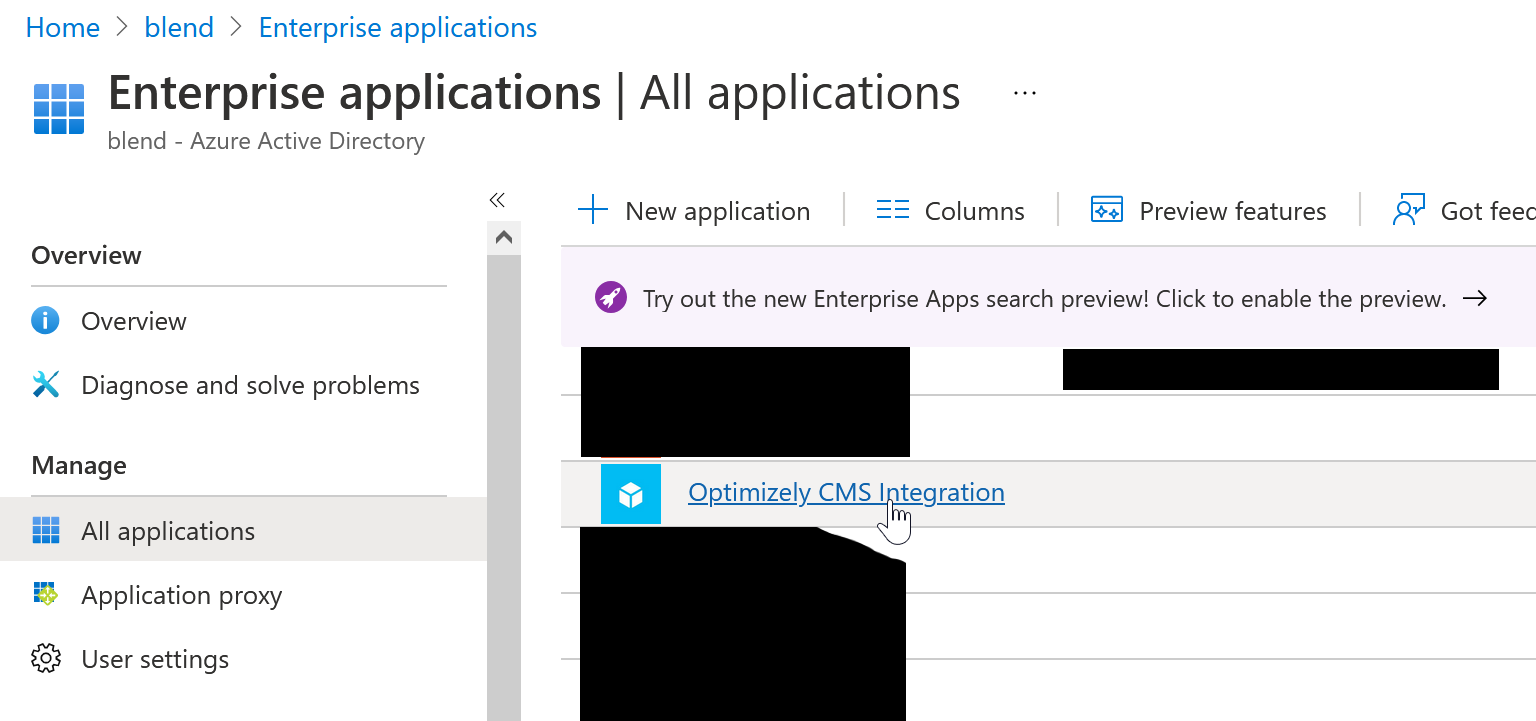
- Head back to your Azure Active Directory, and select Enterprise applications.
- You should see a new Enterprise Application with the same name as your App Registration. Select it.
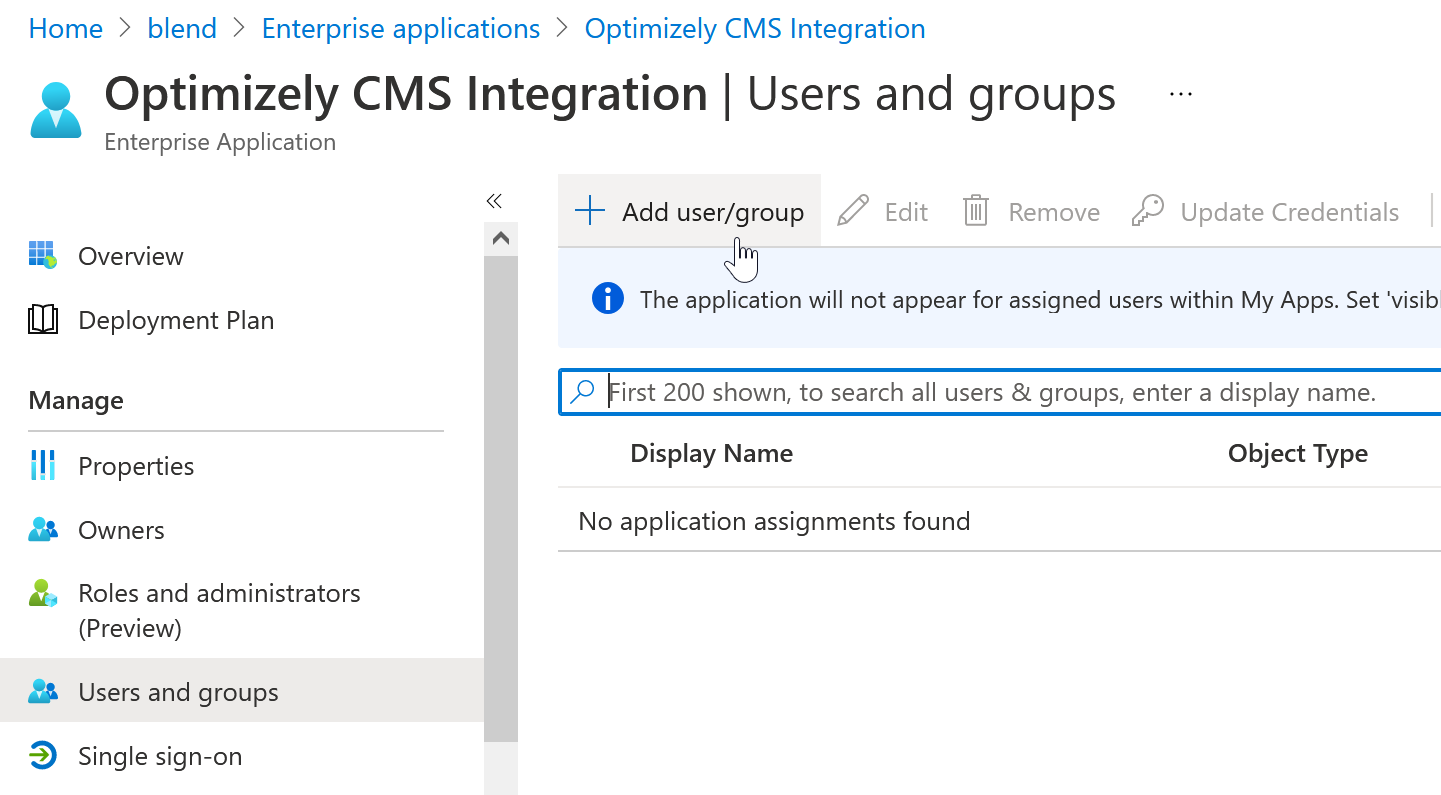
- Select Users and groups from the sidebar
- Click the Add user/group button.
- Select the user(s) you want to assign to this application
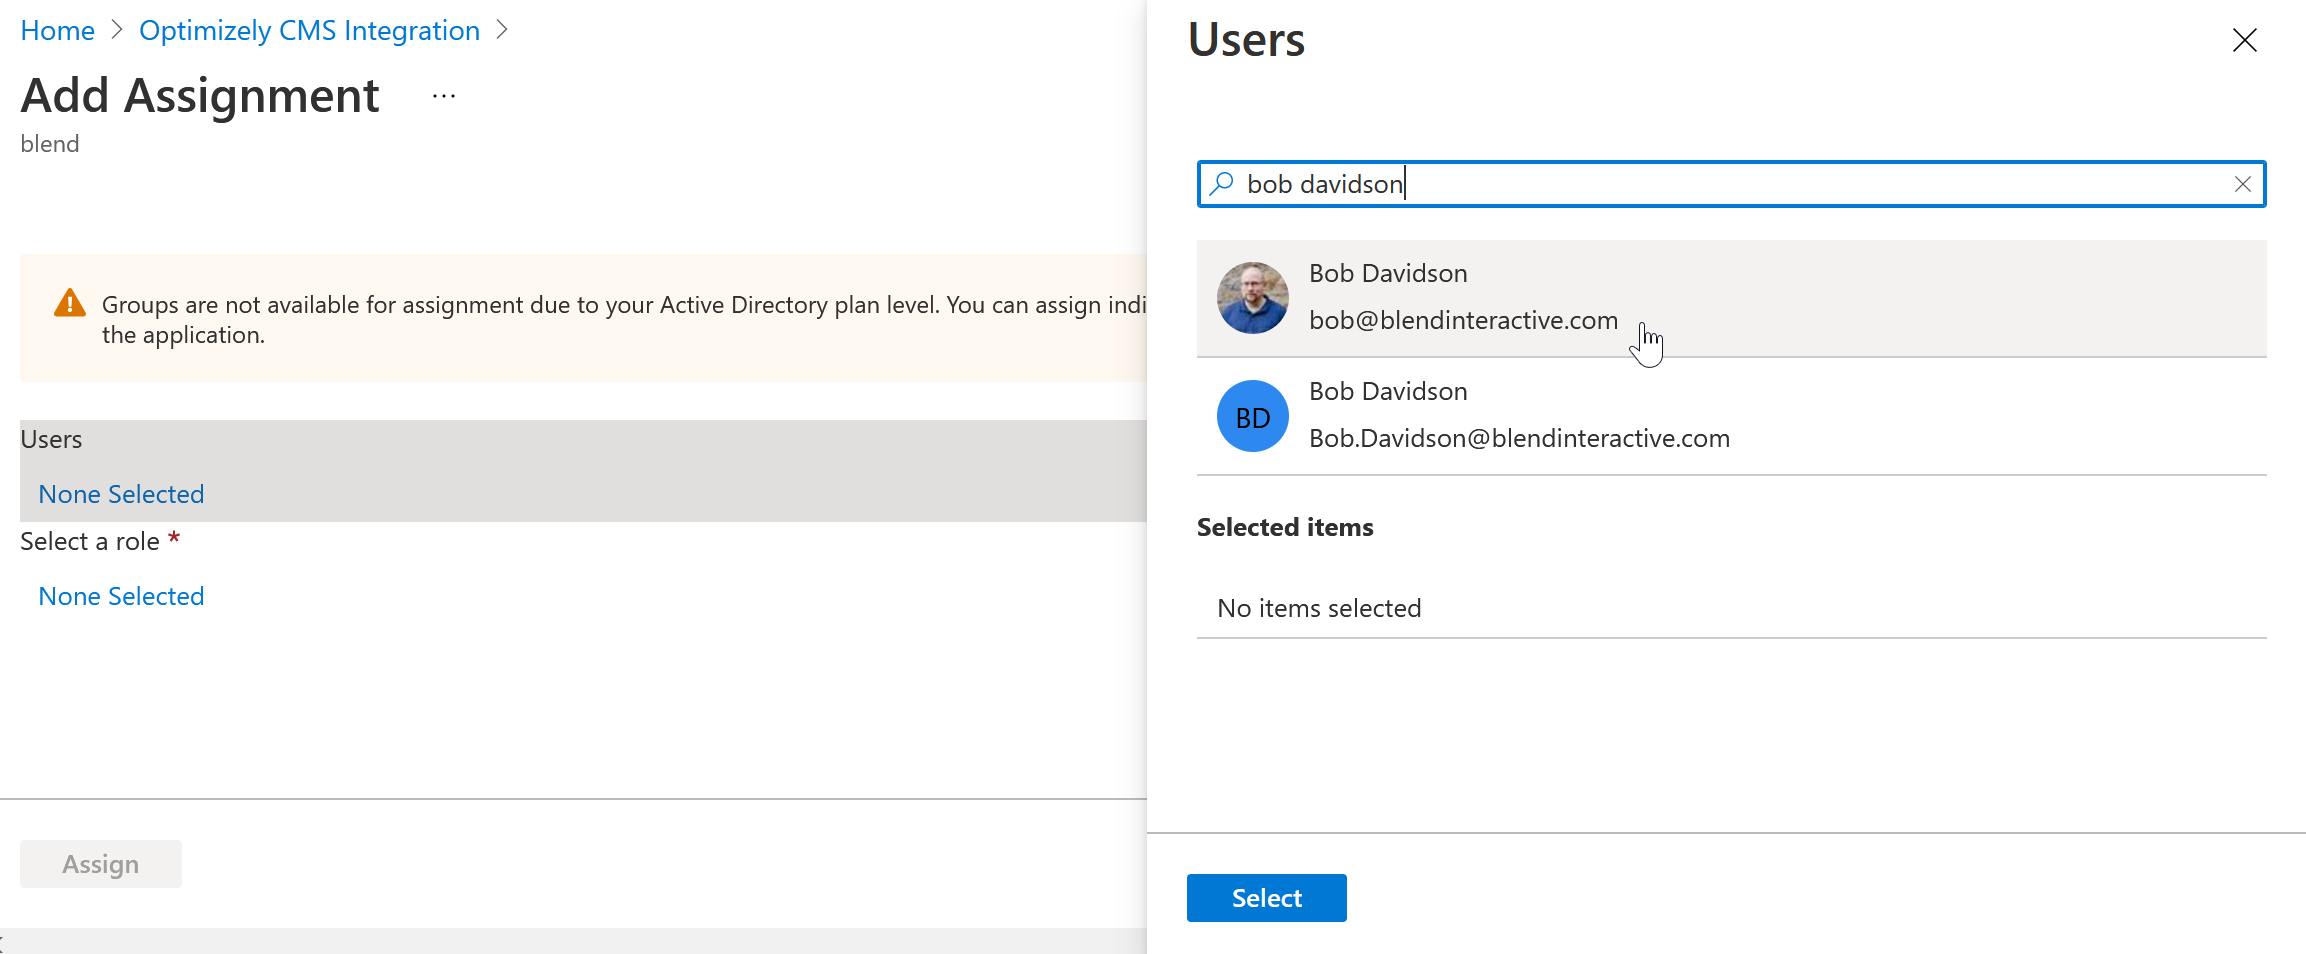
- Select the role you want to assign the user(s) you’ve selected to.
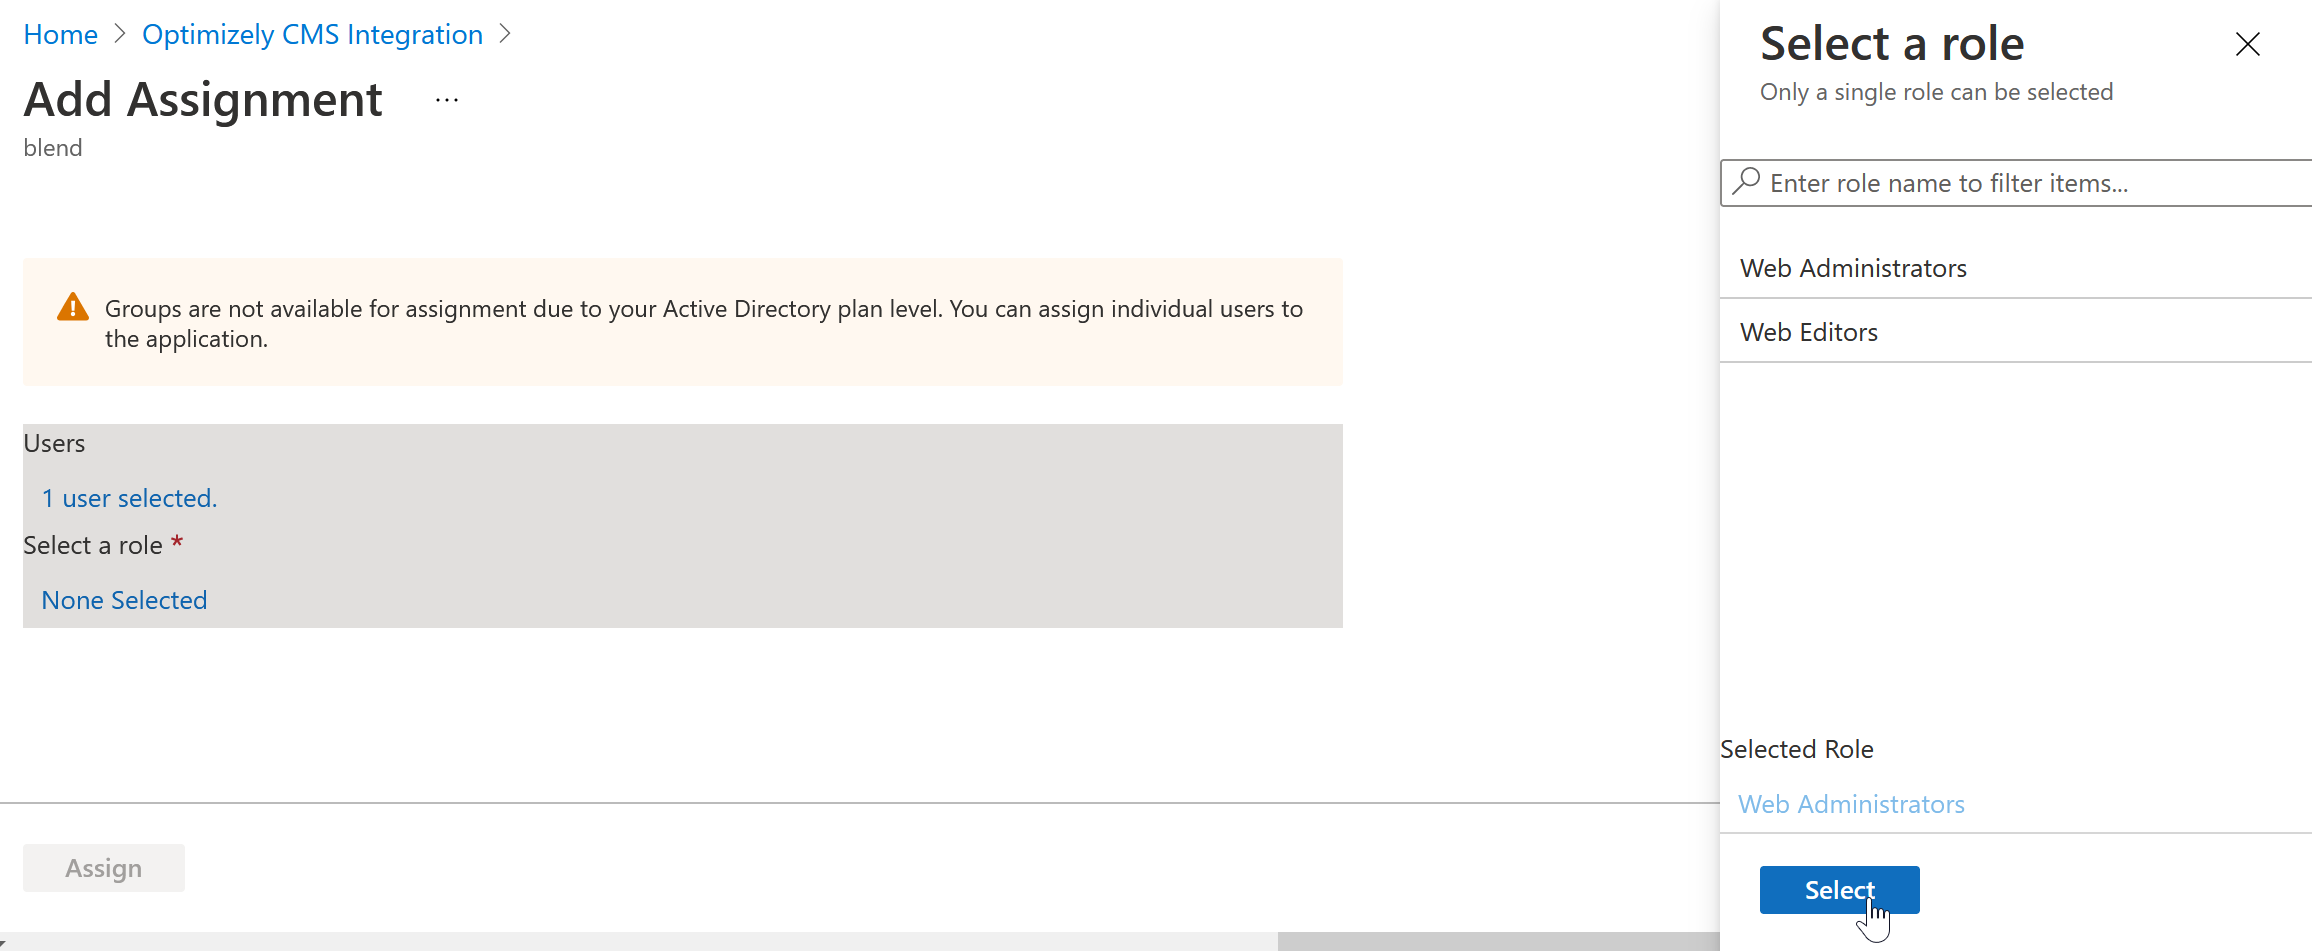
- Click Assign.
Install the Microsoft Open ID package.
Now that the Azure AD application is setup, it’s time to configure the CMS to use it.
Optimizely’s documentation mentions that you’ll need to uninstall the Episerver.CMS package. The problem, of course, is that Episerver.CMS is the package that installs the entire Optimizely CMS. In fact, in a new install, it’s the only directly installed package.
So what to do? Well, the Episerver.CMS package is sort of a meta-package. It holds very little code itself, but instead is mostly a collection of nuget dependencies. So the work-around I’ve applied is to remove the Episerver.CMS package and install all of its dependencies, except for the EPiServer.Cms.UI.AspNetIdentity package, which the documentation says will be incompatible.
Currently, that means installing these packages for the CMS:
EPiServer.HostingEPiServer.CMS.AspNetCore.HtmlHelpersEPiServer.CMS.UIEPiServer.CMS.UI.VisitorGroupsEPiServer.CMS.TinyMce
And this package for the AD integration:
Microsoft.AspNetCore.Authentication.OpenIdConnect
It may be worth checking the most recent Episerver.CMS package’s dependencies to see if this list of CMS dependencies is still accurate.
Configure startup.
You’ll want to start by adding your Client and Tenant IDs to your configuration. The documentation hard-codes these values, but I prefer to put them in configuration files.
- Add the settings to your appsettings.json. Note: the structure here is arbitrary, you can use whatever keys or structure you prefer.
{
  "Logging": {
    "LogLevel": {
      "Default": "Warning",
      "Microsoft": "Warning",
      "EPiServer": "Warning",
      "Microsoft.Hosting.Lifetime": "Warning"
    }
  },
  "urls": "http://*:8000/;https://*:8001/;",
  "AllowedHosts": "*",
  "Authentication": {
    "AzureClientID": "56e0ddbc-XXXX-XXXX-XXXX-XXXXXXXXXXXX",
    "AzureTenantID": "https://login.microsoftonline.com/1d8e55d3-XXXX-XXXX-XXXX-XXXXXXXXXXXX/v2.0"
  },
  "ConnectionStrings": {
    "EPiServerDB": "..."
  }
}
The Application/Client ID can remain as-is. For the Directory/Tenant ID, I convert it here to the URI format, basically:https://login.microsoftonline.com/{{TENANT ID}}/v2.0. - Next, to access the configuration, you’ll need to inject
IConfigurationto your Startup class constructor.
public class Startup { private readonly IWebHostEnvironment _webHostingEnvironment; private readonly IConfiguration _configuration; public Startup(IWebHostEnvironment webHostingEnvironment, IConfiguration configuration) { _webHostingEnvironment = webHostingEnvironment; _configuration = configuration; } } - Now that you’ve removed the
EPiServer.CMSpackage, theAddCms()extension method is gone. Luckily, that function is relatively simple and can be replaced with the following code. It’s important to note here that any changes to theAddCms()method in the future will not appear here. That will be something to keep an eye on.
// Replace services.AddCms() with equivalent code services.AddCmsHost().AddCmsHtmlHelpers().AddCmsUI().AddAdmin().AddVisitorGroupsUI().AddTinyMce(); - Finally, add the authentication code from Optimizely’s documentation, with a few small tweaks for configuration.
services.AddAuthentication(options =>
    {
        options.DefaultAuthenticateScheme = CookieAuthenticationDefaults.AuthenticationScheme;
        options.DefaultChallengeScheme = OpenIdConnectDefaults.AuthenticationScheme;
    })
    .AddCookie()
    .AddOpenIdConnect(options =>
    {
        options.SignInScheme = CookieAuthenticationDefaults.AuthenticationScheme;
        options.ClientId = _configuration["Authentication:AzureClientID"];
        options.Authority = _configuration["Authentication:AzureTenantID"];
        options.CallbackPath = "/signin-oidc";
        options.Scope.Add("email");

        options.TokenValidationParameters = new TokenValidationParameters
        {
            ValidateIssuer = false,
            RoleClaimType = ClaimTypes.Role,
            NameClaimType = ClaimTypes.Email
        };

        options.Events.OnAuthenticationFailed = context =>
        {
            context.HandleResponse();
            context.Response.BodyWriter.WriteAsync(Encoding.ASCII.GetBytes(context.Exception.Message));
            return Task.FromResult(0);
        };

        options.Events.OnTokenValidated = (ctx) =>
        {
            var redirectUri = new Uri(ctx.Properties.RedirectUri, UriKind.RelativeOrAbsolute);
            if (redirectUri.IsAbsoluteUri)
            {
                ctx.Properties.RedirectUri = redirectUri.PathAndQuery;
            }
            //
            //Sync user and the roles to EPiServer in the background
            ServiceLocator.Current.GetInstance<ISynchronizingUserService>().SynchronizeAsync(ctx.Principal.Identity as ClaimsIdentity);
            return Task.FromResult(0);
        };
    });
In my setup, I had to make one final tweak, which may be related to how our applications are set up in our Azure environment. I found that the email claim was not coming through, however, a preferred_username claim was, so I switched the token validation parameters to use that claim instead.
options.TokenValidationParameters = new TokenValidationParameters
{
    ValidateIssuer = false,
    RoleClaimType = ClaimTypes.Role,
    NameClaimType = "preferred_username"
};
With all this done, you should now be able to navigate to /Episerver/CMS of your local install and be redirected to your Azure Active Directory application for authentication.
We're always on the lookout for talent!
We are not currently hiring a Senior .NET Developer. However, we'd still love to get to know you. If you are a talented, detail-oriented, experienced .NET stack developer we are open to chatting about joining our development team.
Resources on .NET development.
We’ve written at length, both here and beyond, on .NET development.

Connecting Patients and Providers: A Guide to Upgrading Provider Search for Children’s Hospitals
When it comes to our children, even the smallest health concern can feel overwhelming. A lingering cough becomes a source of panic. A late-night fever turns into a frantic search for answers. In those moments, clarity and reassurance matter more than ever. But too often, the first point of contact — a hospital’s website — adds more confusion than comfort.

On Technical Debt
It doesn’t matter how fast you move or how much you plan; websites accumulate technical debt.

Input Sanitizing and Common Pitfalls of User Input
With the rise of malicious bots on the Internet, websites are becoming more vulnerable to data breaches. Implementing sanitizing techniques can protect your website and your users.

Optimizely Release Notes — March-April 2024
The following release notes highlight major or interesting changes in Optimizely's products from March and April 2024.